Pages

Showing posts with label Michelle Kim. Show all posts

Friday, 9 March 2018

Hello Summer


Hello, this month's reveal from Let's Get Sketchy has a super pretty mood board and cute sketch! 


Here's my take on the sketch using some of the colours from the mood board and keeping the sketch almost the same. I used a smaller photo but added the Hello Summer card to create a larger area like the large photo in the sketch.


I would love to see your interpretation of our first challenge for March! So come and join in here at Let's Get Sketchy.
Enjoy your day!!
Love Michelle xx

Friday, 16 February 2018

Next Adventure starts now

Good Morning, 

We are right in the hottest month in Summer so still lots of beach trips! 
 Here is our next Sketch for Let's Get Sketchy.
I decided to include one photo and feature the vellum heart in the Webster's Pages Ocean View collection. I love these papers and I still have plenty to create more layouts. 


I had fun adding lots of splatters to my background.


Close ups of the splatters and sequins.


Heidi Swapp's Chipboard title.

Come and join in this month here at Let's Get Sketchy. We have two great sketches and lots of inspiration from our DT. We can't wait to see what you create. 
Have a lovely day
Love Michelle xx

Monday, 1 January 2018

Boys Rule...the best cool fun

Good Morning, Happy New Year!!!

I hope 2018 is a wonderful year full of fun learning, personal growth and lots of creativity. 
Such a great way to start my year is to spend time creating and this sketch challenge helped inspire me. So head over and come and join in with us at Let's Get Sketchy


 I liked the look of the sketch turned to the other side and I'm happy how the added film strip border gave a edge to the triangle corner. This is one of my favourite boyish range called Boys Rule from Crate Paper. Yes it's an older range but I love it and I still have enough left for a few more layouts.
I machine stitched the numbers vellum on top of the star patterned paper and a few more stitching around the different triangles and the boys rule tag.


 The acetate film strip was cut out from a 12x12 sheet from Kaisercraft and the Fun word in Thickers is called Chalkboard grey.


Close ups of all the tickets and words I cut from the PP sheet. Cork stars from DIY shop and Heidi Swapp Tinsel ink splatters.


These photos were taking in 2004!! Where has the time gone!! So nice to be scrapbooking these, I have so much to catch up on.
 My goal next year is to have all my printed photos in an album. Believe me I have a massive pile. So lots of Project life layouts, 12x12 and I'm going to try 8 x 11.
In the next couple of days I will be planning out how to do that exactly and setting a monthly goal. For me I just need to set a time and sit but I will need to have lots of challenges too.
So that's why I enjoy the challenges from Let's Get Sketchy, we would love to see what you create and what goals you have for 2018. 
Have a lovely day and thanks for stopping by. 
Love Michelle xx

Friday, 1 December 2017

Make your dreams happen


Good Morning! How are you? 
Do you have plans for December? It's such a busy time of year with lots of functions and family get togethers!  In all of the fun times I still want time to reflect, take photos and have creative time, so to start off here is the new sketch challenge for Let's Get Sketchy. 


I turned the sketch on its side to create the border going up so the fussy cut butterflies could be scattered up to create movement. The paper range is called Indigo Skies by Kaisercraft and I loved the butterflies and wood together.


Loved this photo of my niece in her cool jacket her Mum sewed, she is so very clever! I used some die cuts and tiny word stickers by Tim Holtz. Washi tape along the side for a border using a black and white stripe from Heidi Swapp, which I love how it's thin and a silver washi too.


I went crazy with blue and silver sequins and I love it! It's really shiny and helped with the scattered look from the butterflies.


Here is a close up to show the silver and white ink I splattered to finish my page.
We would love to see your take on the sketch, please check out the other DT's layouts for some inspiration here
Have a lovely day and thanks for stopping by
Love Michelle xx

Thursday, 10 March 2016

For the love of pineapples!!


Morning everyone,

Who can understand the trends sometimes? Pineapples became one and I was delighted! Some people don't get it but besides loving to eat fresh sweet pineapples, my love of the pineapple stems back to my childhood.
See I'm a Queenslander and the memories I have of going to see the Big Pineapple is still there.
I live in WA now and moved here when I was 13, I still hope to take my children to QLD one day.


This layout uses Typo paper and Typo wood veneers!! How cute are they? This has been sitting in my to do box forever it seems. So one more completed and I am on track to finishing what I started.


Close ups, just love the wood veneers.


I don't think this is my usual style but I am happy I have this to add to the album.
Have a lovely day.
Michelle xx

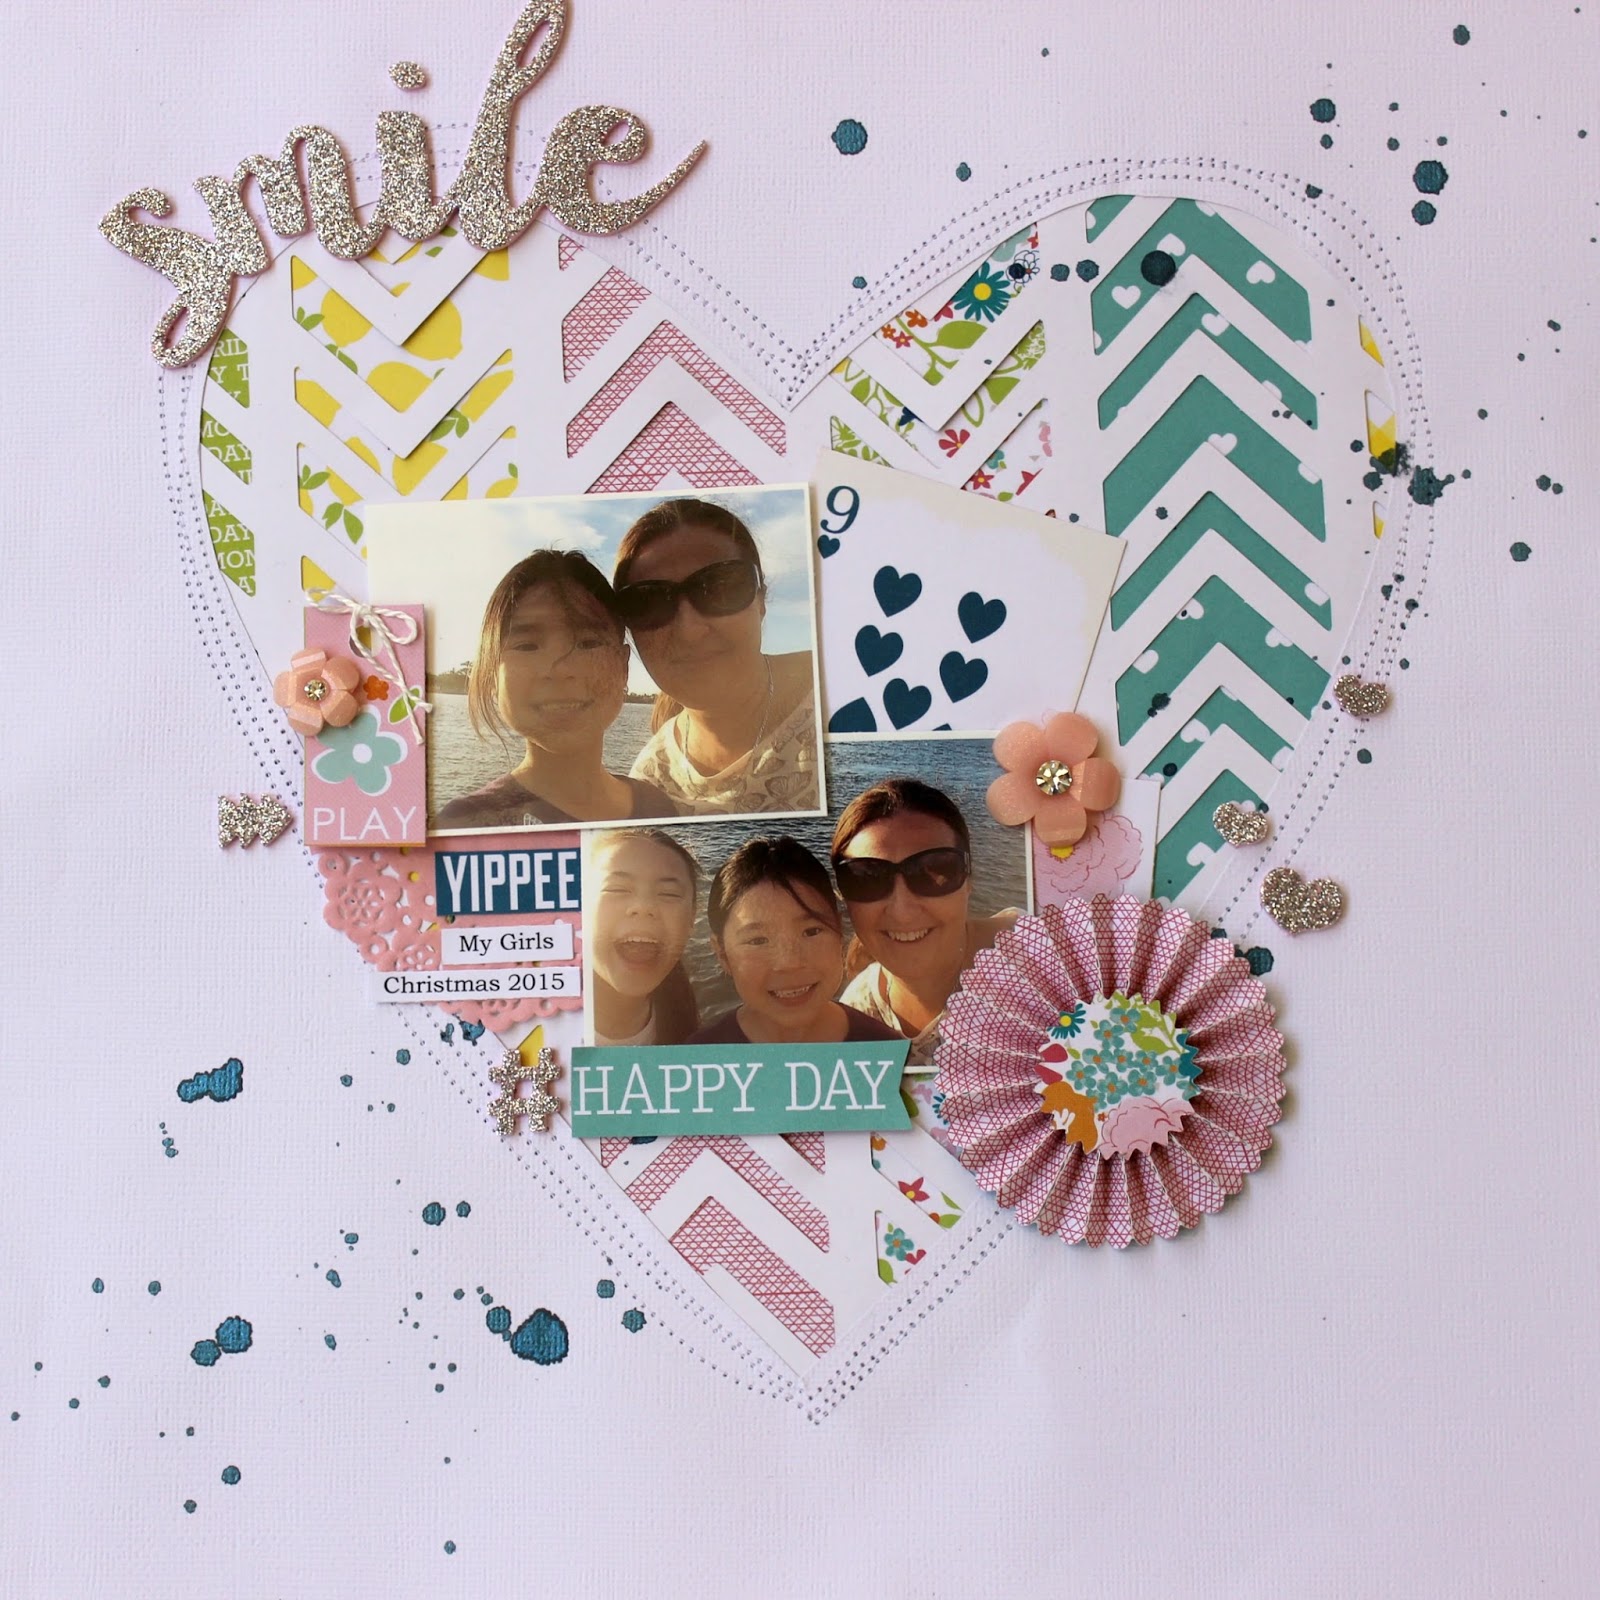
Smile

Smile

Hello there, how is everyone this week? Has anyone had time to create? 

Perhaps you are excited for this year, a fresh start to try something new? 

We would love to encourage you to go for it!! There is so much inspiration shared here from Scrapping Clearly and we hope you enjoy visiting us throughout this year. 

I had a lot of fun with this one creating this layout using some of the Chickaniddy Crafts Yippee range. I love the colours and summery designs. 

 I cut out a heart shape from the Kaisercraft Bow and Arrow Chevron 12 x 12 diecut and a slightly smaller heart out of the white cardstock. At the back of the chevron I attached 6 different strips of pattern paper. It was all stitched together, several times to create a whimsical heart.

 This Pinwheel was cut using the Tim Holtz die. The silver glittered foam hearts, arrow and my title Smile was using the thickers from Cedar Lane collection.

Have a lovely day being creative! 
Michelle xx

you + me

you + me


Happy holidays everyone, I am really enjoying our school break. 

So many exciting things are happening and it's that time of year for CHA. So many new products to swoon over!! What is your favourite?

Anyway I'm slightly side tracked, here is my take on the January sketch and I decided to turn it around. We can't wait to see your interpretation.


 This paper range is called Chickaniddy from the Yippee collection. I used lots of the different papers onto white cardstock to add layers and tags. Then some of the layers were matted with black to add contrast.

I used the sequin threads instead of the paint drips. The black and white stickers are from Heidi Swapp.

 Gorgeous gold sparkly foam word thickers (you + me) are from the Cedar Lane collection.


 Close up of the sequins and foam letters.


 My tag has journaling and on the other side I added an extra photo and some washi tape.


Have a lovely day and enjoy your holidays!
Michelle xx

Memory planner 2016!!


Memory Planner 2016!!

Happy 2016 everyone!! A new exciting year to be inspired and have renewed goals. 

I was so very happy with my Christmas gift from Kylie, a beautiful memory planner created by the talented Heidi Swapp! It's in the Scrapping Clearly Shop every one of the gorgeous planner accessories you will be looking for.

This planner seems to be made with everything I love. The floral, the gold, the black and white stripes and the quotes. Love it so much!! I couldn't ask for more.

Here is a link to the Heidi Swapp overview of her 2016 memory planners, I love to listen to her enthusiasm for memory keeping. You all know what I am talking about, Heidi certainly motivates me to want to record my memories.

  This is my first pretty planner and I am looking forward to creating my pages and having everything in one place that I can refer to easily. My life certainly needs this!

 Everything was thought of to make this planner functional and fun with these emoji stickers a must have.
I really want to add handmade items as well and will do so throughout the year. The first handmade item is this cute vellum bow that I purchased from Rainbow Splendour and I added a gold paper clip. 

There will be lots of inspiration from all the design team members every month planning, so we look forward to sharing with you all. Please feel free to comment on any of the blog posts and we will be happy to chat.

My organiser is a bamboo cutlery draw from Kmart spray painted white with the Heidi Swapp gold spot washi tape added around the base. 
Happy planner days to you all!!
Michelle xx 

Wednesday, 23 December 2015

My Daily December

Hello everyone and Merry Christmas!! 
With just 3 days to go, here are some more of my December daily pages. I will warn you there are a lot of photos!!
 This would have to be my favourite Christmas project I have worked on and I look forward to doing one next year. However it will be more formal and more organised to make it easier to complete.
There isn't any journaling shown for privacy purposes but there are plenty of hidden tags, envelopes and project life cards to write on later.

Please feel free to comment below and ask questions on any of these pages as I will be happy to chat about my experience or any of the products.

 The white bow was hand stitched using the Amy Tangerine stitching kit.

 I added the program from our pageant with a custom sized plastic sleeve using the fuse tool.

 I liked using all different size photos for variety and the large full page one has a big impact.

 Here is a small fold out for photos using Washi tape to join the project life size cards together.

Showing a close up of the Washi tape joining the fold out cards.

 The hidden tag behind the photo has a handmade tassel attached.

  Burlap tag for added texture.

 Close up of the acetate page with the beautiful chipboard heart from Your Creative Wings. I attached it with Jac paper and covered the centre with fine white glitter. Looks super cute and I am so happy with the result.

A great way to add photos is to create a collage. I used Pic Monkey and it was so easy. 

 Another custom made sleeve using the Fuse tool, one side with a diecut and shaker pocket. The other side a photo.

 Project life cards backed together are a great quick insert and good for journaling on.

 Heidi Swapp Lovely word die cuts easily through thin cork.

Several different white and gold Washi tapes were used throughout. 
I love this Christmas snowflake die I borrowed from a friend using the gold glitter paper. 
I used the Candy Cane Lane range by Teresa Collins and her Studio Gold project life cards.
Thank you so much for taking the time to look and get to the bottom of my post today. That was very photo heavy! 
We would love to hear how your December daily album is going. 
Till next week,stay safe and enjoy your Christmas holidays with family and friends. 
 Michelle xx

Christmas Mini Album

Christmas Mini Album


 Hi everyone, how is your December so far?

 It can certainly get very busy and somewhat hectic at times.
 I know it is for me and sometimes I miss the small moments, so for that reason I have felt impressed to capture my December in this mini wooden album from Heidi Swapp. 

This is the first time I have compiled something like this so I decided to use what I have in my home. I will be creating with the Candy Cane Lane range by Teresa Collins found here in the Scrapping Clearly shop.

The beautiful chipboard on this vellum cover page is from Your Creative Wings and I have a few more pieces that I will be using thoughout my album.


This page was created by sewing pockets using an A4 binder sleeve so that my photo a day would slide in and fit perfectly.


Here is the back of that custom made sleeve and I printed on a sheet of vellum my reason for creating this album. The Candy Cane Land sticker sheet and chipboard used to embellish. That glitter epoxy round is made using one of the stickers.


A bowl full of tiny words I created for my December Album. I love how they are custom made just for me and can be added where needed. Just using some double sided tape to the backs.


 Some of the die cuts with enamel dots.


Recipe on the left with a card that can slide in and out of a PL waterfall sleeve that I attached to the page with double sided tape. 

More cooking ideas inside that vellum envelope made to size using the We R Memory keepers punch board found in the Scrapping Clearly store. I will be making more using this punch board as it's easy to use and so versatile. So very helpful for customising your projects.
 A photo collage page with many more pages to come that I will continue to add to this coming week.
 We love hearing about your plans to create this month. Please comment below if you have a question or just want to share your project with us.
Thank you for stopping by and have a lovely day xx